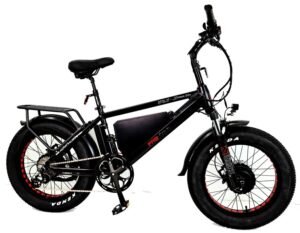

The Brain of Your 36V Electric Bicycle
First, a 36V ebike controller manages power flow from your battery to the motor . It reads inputs from the throttle, pedal sensor, and brake levers. Then it decides how much power to send to the motor. Without a controller, your e-bike simply won’t work.
Voltage Compatibility
A 36V controller works with 36V lithium-ion batteries. The full charge voltage is 42V for 36V systems. The low voltage cutoff typically sits around 31.5V ±0.5V . This protects your battery from over-discharge damage.
Many 36V controllers are actually 36V/48V dual-voltage units . They work with both battery types automatically. This gives you flexibility for future upgrades.
Power Ratings and Current Limits
36V controllers come in different power ratings for different motor sizes.
| Motor Power | Typical Current | Common Uses |
|---|---|---|
| 250W | 10-15A | City e-bikes, light commuting |
| 350W | 15-18A | Hill climbing, heavier riders |
| 500W | 18-22A | Off-road, cargo bikes |
| 750W | 22-25A | High-performance builds |
A 36V 250W controller typically has a 15A current limit. A 350W version may use 15-18A. For 500W motors, look for 20-22A controllers . Always match the controller amperage to your motor’s rating.
Sine Wave vs. Square Wave Controllers
Sine wave controllers are quieter and smoother. They use Field Oriented Control (FOC) technology . The motor runs with less noise and vibration. Sine wave units also feel more natural when pedaling.
Square wave controllers cost less but produce more noise. The motor may hum or buzz during acceleration. These work fine for budget builds but feel less refined.
KT controllers are known for sine wave operation. They work with KT-LCD series displays . Popular models include the KT-36ZWS series for 36V hub motors.
Motor Compatibility Requirements
Your motor must match the controller specifications. Most 36V controllers work with brushless DC hub motors. They require hall sensors for smooth startup .
| Motor Type | Controller Compatible? |
|---|---|
| BLDC hub motor with hall sensors | ✅ Yes |
| BLDC hub motor sensorless | ⚠️ Some models |
| Brushed DC motor | ❌ No (different controller type) |
The controller automatically detects 60° or 120° phase angles . This helps match different motor types. If your motor lacks hall sensors, look for a sensorless controller.
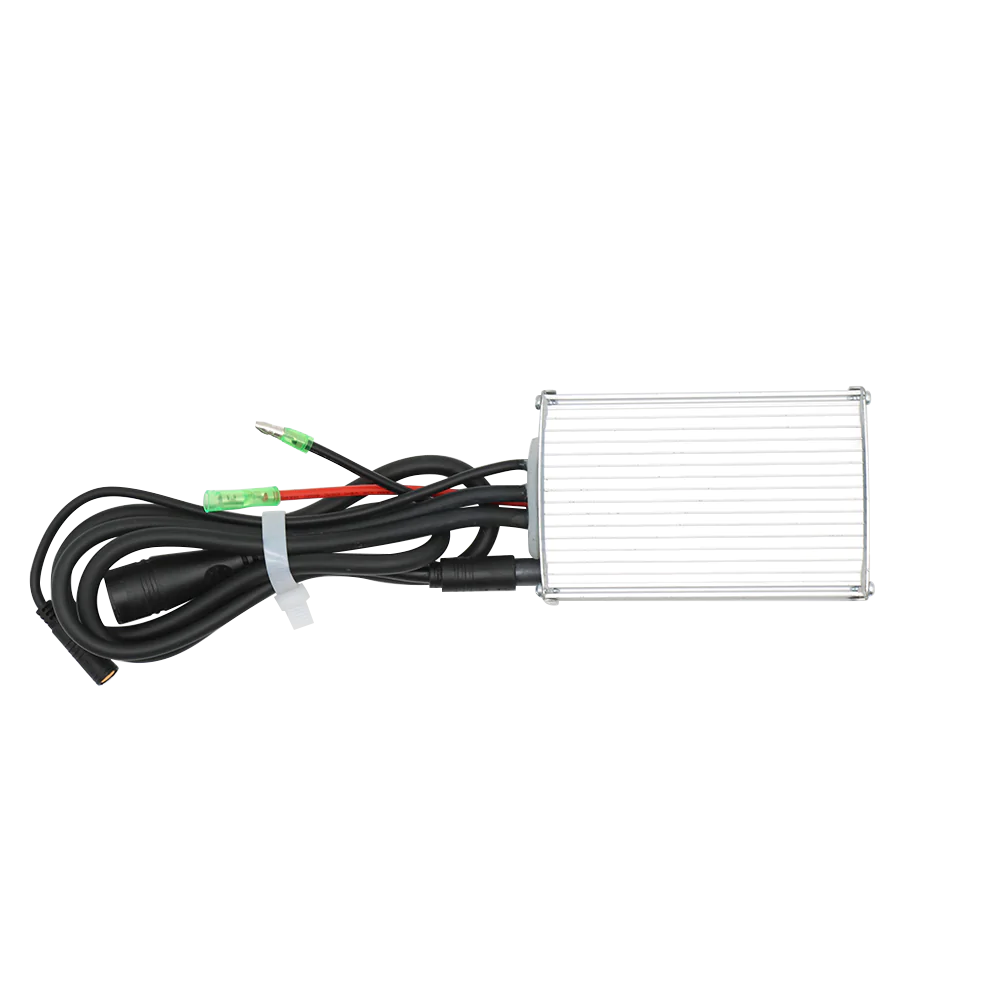
Connectors and Wiring Guide
Standard 36V controllers have several connection ports. Each port serves a specific function.
Thick power wires (red/black):
- Connect directly to the battery
- Use Anderson or XT60 connectors
- Always install a fuse for safety
Motor phase wires (yellow, blue, green):
- Three thick wires for motor power
- Connect to matching motor wires
- Swap any two to reverse motor direction
Hall sensor connector (5-pin):
- Red = +5V power
- Black = ground
- Green, blue, yellow = hall signals
- Plug directly into matching motor cable
Throttle connector (3-pin):
- Red = +5V
- Black = ground
- White or blue = signal (1-4.2V)
- Accepts standard hall-effect throttles
PAS sensor connector (3-pin):
- Connects to pedal assist sensor
- Detects pedaling motion
- Enables automatic motor assistance
Brake connectors (2-pin each):
- Front and rear brake cutoffs
- Short to ground when brakes applied
- Cuts motor power immediately
Table of Common 36V Controller Connectors
| Port | Pins | Wire Colors | Function |
|---|---|---|---|
| Battery | 2 | Thick Red/Black | Main power |
| Motor Phase | 3 | Yellow, Blue, Green | Motor drive |
| Hall Sensor | 5 | Red, Black, Grn, Blu, Yel | Motor position |
| Throttle | 3 | Red, Black, Blue | Speed control |
| PAS | 3 | Red, Black, Yellow | Pedal assist |
| Brakes | 2 | Yellow, Black | Brake cutoff |
| Display | 5 | Red, Black, White, Grn | LCD communication |
| Lights | 2 | Red, Black | Headlight power |
Display Compatibility
Most 36V controllers work with LCD displays. The display shows speed, battery level, and assist settings. Different brands use different communication protocols.
KT controllers work with KT-LCD3, KT-LCD5, and KT-LCD8 displays . They use a proprietary UART serial protocol. Generic controllers may use SW900 or M5 displays.
To check compatibility:
- Look for a 5-pin display port on the controller
- Verify the pinout matches your display
- Ask the seller about display compatibility before buying
Installation Steps
Installing a 36V controller takes about 30-60 minutes. Follow these steps for a successful installation.
- Disconnect the battery completely
- Remove the old controller from its mounting location
- Connect the motor wires – match colors first
- Connect hall sensors – match the 5-pin connector
- Wire the battery – red to positive, black to negative
- Plug in the throttle – usually a 3-pin waterproof connector
- Connect PAS sensor – mount the magnet disc on your crank
- Attach brake cutoffs – plug each brake lever wire
- Connect the display – 5-pin JST or Julet connector
- Test before riding – lift rear wheel and test throttle
If the motor spins backward:
- Swap any two phase wires
- Or swap the corresponding hall sensor wires
- The motor should then spin correctly
Troubleshooting Common Issues
Motor won’t start:
- Check battery voltage (should be above 31.5V)
- Verify all connectors are fully seated
- Test throttle signal voltage (should respond when twisted)
Motor runs roughly:
- Check hall sensor connections
- Verify phase wire order is correct
- Try sensorless mode if available
Controller gets very hot:
- Reduce current limit in display settings
- Improve airflow around controller
- Motor may be drawing too much current
Display shows error code:
Common 36V Controller Models
KT-36ZWS Series:
- Available in 15A, 22A, and 25A versions
- Sine wave operation (quiet and smooth)
- Works with KT-LCD displays
- Popular for DIY builds
ZAWELIYO 36V/48V 22A:
- Dual voltage (works with 36V or 48V)
- 500W/750W motor support
- Compatible with KT series displays
- IP56 water-resistant rating
Greentime 36V/48V 350W:
- Basic square wave operation
- Works with M5 LCD display
- Hall sensor auto-detect
- Low-cost option
Regenerative Braking
Some 36V controllers support regenerative braking. This feature sends energy back to the battery when braking. It can extend your range slightly. However, regen only works with direct-drive hub motors, not geared hubs.
Safety Features
Quality 36V controllers include multiple safety protections:
- Low voltage cutoff – prevents battery damage
- Overcurrent protection – stops excess power draw
- Thermal shutdown – protects from overheating
- Brake override – cuts power immediately when braking
- Short circuit protection – fails safely
Pros of 36V Controllers
- Standard voltage for many e-bike systems
- Wide range of compatible motors available
- Affordable replacement and upgrade options
- Works with common LCD displays (KT, SW900)
- Supports pedelec (PAS) and throttle modes
- Multiple protection features included
- Available as sine wave for quiet operation
- Compatible with 36V/48V dual-voltage systems
Cons of 36V Controllers
- Less powerful than 48V or 52V systems (typically max 750W)
- May require programming for optimal performance
- Cheap units can have unreliable connectors
- Some display protocols are brand-specific
- Generic models often lack documentation
Who Needs a 36V Controller?
A 36V ebike controller is essential for:
- DIY builders converting a standard bicycle into an e-bike
- Bike owners replacing a failed original controller
- Upgraders seeking sine wave operation or more current
- E-bike mechanics stocking common replacement parts
- Anyone with a 250W-750W 36V hub motor
Why Choose the Right 36V Controller?
In conclusion, selecting the correct 36V ebike controller requires matching voltage, current rating, and motor type. A 36V 15A controller works well for 250W commuter setups. A 22A unit provides more power for 500W motors.
Sine wave controllers offer smoother, quieter operation than square wave units. KT series controllers are well-documented and work with popular LCD displays. Generic controllers cost less but may have limited support.
Before purchasing, verify your motor has hall sensors and that your display matches the controller’s protocol. With the right controller, your e-bike will deliver reliable, efficient power for years.
For more options, browse our Collection of E-Bike Controllers or read our DIY E-Bike Build Guide for wiring diagrams.